
Element Call




The world's first 🌐 decentralized and 🤝 federated video conferencing solution powered by the Matrix protocol.
📌 Overview
Element Call is a native Matrix video conferencing application developed by Element, designed for secure, scalable, privacy-respecting, and decentralized video and voice calls over the Matrix protocol. Built on MatrixRTC (MSC4143), it utilizes MSC4195 with LiveKit as its backend.

You can find the latest development version continuously deployed to call.element.dev.
Note
For prior version of the Element Call that relied solely on full-mesh logic, check
full-meshbranch.
✨ Key Features
✅ Decentralized & Federated – No central authority; works across Matrix homeservers. ✅ End-to-End Encrypted – Secure and private calls. ✅ Standalone, Widget & Component Mode – Use as an independent app, embed in Matrix clients as a widget, or (experimentally) mount it as a React component inside your own application. ✅ WebRTC-based – No additional software required. ✅ Scalable with LiveKit – Supports large meetings via SFU (MSC4195: MatrixRTC using LiveKit backend). ✅ Raise Hand – Participants can signal when they want to speak, helping to organize the flow of the meeting. ✅ Emoji Reactions – Users can react with emojis 👍️ 🎉 👏 🤘, adding engagement and interactivity to the conversation.
🚀 Deployment & Packaging Options
Element Call is developed using the Matrix js-sdk with Matroska mode. This allows the app to run either as a Standalone App directly connected to a homeserver with login interfaces or it can be used as a widget within a Matrix client.
🖥️ Standalone Mode

In Standalone mode, Element Call operates as an independent, full-featured video conferencing web application, enabling users to join or host calls without requiring a separate Matrix client.
📲 In-App Calling (Widget Mode in Messenger Apps)
When used as a widget 🧩, Element Call is solely responsible for the core calling functionality (MatrixRTC). Authentication, event handling, and room state updates (via the Client-Server API) are handled by the hosting client. Communication between Element Call and the client is managed through the widget API.

Element Call can be embedded as a widget inside apps like Element Web or Element X (iOS, Android), bringing MatrixRTC capabilities to messenger apps for seamless decentralized video and voice calls within Matrix rooms.
Important
Embedded packaging is recommended for Element Call in widget mode!
📦 Element Call Packaging
Element Call offers two packaging options: one for standalone or widget deployment, and another for seamless widget-based integration into messenger apps. A third, experimental option builds it as a React component library for applications that want to render a call inside their own page rather than in an iframe. Below is an overview of each option.
Full Package – Supports both Standalone and Widget mode. It is hosted as a static web page and can be accessed via a URL when used as a widget.

Embedded Package – Designed specifically for Widget mode only. It is bundled with a messenger app for seamless integration and this is the recommended method for embedding Element Call.

Component Package (experimental) – A library build of Element Call as a React component, consumed as a dependency by a host application that already has a Matrix client. See Element Call as a component below.
For more details on the packages, see the Embedded vs. Standalone Guide.
🛠️ Self-Hosting
For operating and deploying Element Call on your own server, refer to the Self-Hosting Guide.
MatrixRTC Transports
For proper operation of Element Call, each deployment needs to set up a MatrixRTC transport in the form of a LiveKit server as outlined in the Self-Hosting Guide. A typical federated site deployment for three different sites A, B and C is depicted below.

Transport Discovery
Element Call discovers the available MatrixRTC transports (as defined by
MSC4519) by
hitting the GET /_matrix/client/unstable/org.matrix.msc4143/rtc/transports
endpoint of the Client-Server API. An example response:
{
  "rtc_transports": [
    {
      "type": "livekit",
      "livekit_service_url": "https://matrix-rtc.example.com/livekit/jwt"
    }
  ]
}
where the format for MatrixRTC using LiveKit backend is defined in
MSC4195.
In the example above Matrix clients do discover a focus of type livekit which
points them to a MatrixRTC Authorization Service
via livekit_service_url.
Backend Selection
- Each call participant proposes their discovered MatrixRTC transport from
org.matrix.msc4143.rtc_fociin theirorg.matrix.msc3401.call.memberstate event. - For the LiveKit MatrixRTC backend
(MSC4195),
the first participant who joined the call defines which backend will be used for this call via
the
foci_preferredkey in theirorg.matrix.msc3401.call.memberstate event. - During the actual call join flow, the MatrixRTC Authorization Service provides the client with the LiveKit SFU WebSocket URL and an access JWT token in order to exchange media via WebRTC.
The example below illustrates how backend selection works across Matrix federation, using the setup from sites A, B, and C. It demonstrates backend selection for Matrix rooms 123 and 456, which include users from different homeservers.

🌍 Translation
If you'd like to help translate Element Call, head over to Localazy. You're also encouraged to join the Element Translators space to discuss and coordinate translation efforts.
🛠️ Development
Dependencies
- Node.js (e.g. via nvm)
- Corepack (not bundled with Node.js anymore starting from 25.0.0)
- Docker client and runtime + Docker Compose (for the backend)
- On macOS you can install everything with
brew install colima docker docker-compose
- On macOS you can install everything with
Frontend
To get started clone and set up this project:
git clone https://github.com/element-hq/element-call.git
cd element-call
corepack enable
pnpm install
To use it, create a local config by, e.g.,
cp ./config/config.devenv.json ./public/config.json and adapt it if necessary.
The config.devenv.json config should work with the backend development
environment as outlined in the next section out of box.
You're now ready to launch the development server:
pnpm dev
See also:
Element Call as a component
Element Call can be rendered inside another React app instead of an iframe. The host supplies its own Matrix client, and the call stays inside the element it is mounted in.
Install
npm install @element-hq/element-call-component
Releases publish the package with the same version as Element Call. For an unreleased commit, depend on this repository directly:
"@element-hq/element-call-component": "github:element-hq/element-call#main&path:/component"
This builds on install, so the host needs pnpm (via Corepack) and must allow
the build (allowBuilds in its pnpm-workspace.yaml).
Use
- Provide the externals yourself:
react,react-dom,matrix-js-sdk,@vector-im/compound-web,@vector-im/compound-design-tokens, and Compound's stylesheet. - Import
@element-hq/element-call-component/style.css. - Await
initializeElementCall(config)once before rendering. - Render the component with
client,roomIdand anintent; optionally passconfig,hostBridge,languageandtheme(both can change mid-call). Control it through therefhandle (join,hangUp,setDeviceMute).
Load the component lazily. Types, enums and configurationForIntent are
available without it from @element-hq/element-call-component/api. The full
API is in component/index.tsx, component/api.ts and component/host.ts.
How it differs from the widget
- It lays out for its container, not the window: a small container gets the picture-in-picture layout.
- Its styles and keyboard shortcuts are scoped to its root, so the host page is untouched and several instances can share a page. The global JS controls stay page-wide.
- It draws a solid background by default and never offers profile editing.
- If the host bridge implements
close(), it asks to be unmounted instead of showing its own post-call and error screens. - Sounds, images and the MediaPipe runtime are separate files the host's bundler copies (webpack 5, Vite, Rollup); MediaPipe is fetched only when a background effect is first used.
Develop
pnpm build:componentbuilds the library intocomponent/dist. It ends withscripts/check-component-bundle.mjs, which fails the build on what a host must not be handed: an asset inlined as a data URL, a file referenced by an absolute path, the standalone app's client store worker, or a module over its size budget.pnpm dev:componentserves a test host onhttps://localhost:3001: two calls side by side in resizable boxes, with host messages logged at the bottom. It uses the development backend,public/config.jsonif present, and needs the same certificate exception aspnpm dev(see Backend).- Run pnpm commands from the repository root;
component/is its own pnpm project.
Backend
A docker compose file docker-compose-dev.yml is provided to start the
whole stack of components which is required for a local development environment
including federation:
- Minimum Synapse Setup (servernames:
synapse.m.localhost,synapse.othersite.m.localhost) - MatrixRTC Authorization Service (Note: requires Federation API and hence a TLS reverse proxy)
- Minimum LiveKit SFU setup using dev defaults for config
- Minimum
localhostCertificate Authority (CA) for Transport Layer Security (TLS)- Hostnames:
m.localhost,*.m.localhost,*.othersite.m.localhost - Add ./backend/dev_tls_local-ca.crt to your web browser's trusted certificates
- Hostnames:
- Minimum TLS reverse proxy for
- Synapse homeserver:
synapse.m.localhostandsynapse.othersite.m.localhost - MatrixRTC backend:
matrix-rtc.m.localhostandmatrix-rtc.othersite.m.localhost - Local Element Call development
call.m.localhostviapnpm dev --host - Element Web
app.m.localhostandapp.othersite.m.localhost - Note certificates will expire on Thr, 20 September 2035 14:27:35 CEST
- Synapse homeserver:
These use a test 'secret' published in this repository, so this must be used only for local development and never be exposed to the public Internet.
Make sure your Docker runtime is running (e.g. via colima start) and then start
the backend components:
pnpm backend
# or for podman-compose:
# podman-compose -f docker-compose-dev.yml up
Note
To ensure your local development frontend functions properly, you’ll need to add certificate exceptions in your browser for
https://localhost:3000andhttps://matrix-rtc.m.localhost/livekit/jwt/healthz. This can be done either by adding the minimum localhost CA (./backend/dev_tls_local-ca.crt) to your web browser's trusted certificates or by simply copying and pasting each URL into your browser’s address bar and follow the prompts to add the exception.
Updating snapshots
To update snapshots used in tests, use Vitest's -u flag, e.g.:
pnpm test DeveloperSettingsTab -u
Playwright tests
Our Playwright tests run automatically as part of our CI along with our other tests, on every pull request.
You may need to follow instructions to set up your development environment for running Playwright by following https://playwright.dev/docs/browsers#install-browsers and https://playwright.dev/docs/browsers#install-system-dependencies.
However the Playwright tests are run, an element-call instance must be running
on https://localhost:3000 (this is configured in playwright.config.ts) - this
is what will be tested. The tests under playwright/component instead drive
the component harness (pnpm dev:component) on https://localhost:3001, which
Playwright starts as a second web server; it is always a Vite dev server, even
when the app itself is served from Docker with USE_DOCKER.
The local backend environment should be running for the test to work:
pnpm backend
There are a few different ways to run the tests yourself. The simplest is to run:
pnpm run test:playwright
This will run the Playwright tests once, non-interactively.
There is a more user-friendly way to run the tests in interactive mode:
pnpm run test:playwright:open
The easiest way to develop new test is to use the codegen feature of Playwright:
npx playwright codegen
This will record your action and write the test code for you. Use the tool bar to test visibility, text content and clicking.
Investigate a failed test from the CI
In the failed action page, click on the failed job, then scroll down to the
upload-artifact step. You will find a link to download the zip report, as per:
Artifact playwright-report has been successfully uploaded! Final size is 1360358 bytes. Artifact ID is 2746265841
Artifact download URL: https://github.com/element-hq/element-call/actions/runs/13837660687/artifacts/2746265841
Unzip the report then use this command to open the report in your browser:
npx playwright show-report ~/Downloads/playwright-report/
Under the failed test there is a small icon looking like "3 columns" (next to the test name file name), click on it to see the live screenshots/console output.
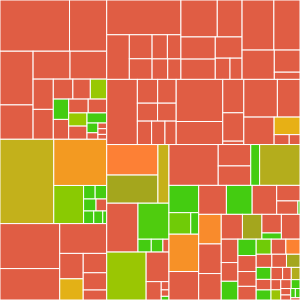
Test Coverage
Add a new translation key
To add a new translation key you can do these steps:
-
Add the new key entry to the code where the new key is used:
t("some_new_key") -
Run
pnpm i18nto extract the new key and update the translation files. This will add a skeleton entry to thelocales/en/app.jsonfile:{ ... "some_new_key": "", ... } -
Update the skeleton entry in the
locales/en/app.jsonfile with the English translation:{ ... "some_new_key": "Some new key", ... }
📖 Documentation
Usage and other technical details about the project can be found here:
GitHub Labels
GitHub labels in this repository are maintained in the labels.yml file and
automatically synced to GitHub using the sync-labels workflow.
We do this so that we can reuse the labels between repositories.
Warning
Do not manually edit labels in the GitHub UI. Any manual changes will be overridden by the workflow on its next invocation.
📝 Copyright & License
Copyright 2021-2026 New Vector Ltd
This software is dual-licensed by New Vector Ltd (Element). It can be used either:
(1) for free under the terms of the GNU Affero General Public License (as published by the Free Software Foundation, either version 3 of the License, or (at your option) any later version); OR
(2) under the terms of a paid-for Element Commercial License agreement between you and Element (the terms of which may vary depending on what you and Element have agreed to). Unless required by applicable law or agreed to in writing, software distributed under the Licenses is distributed on an "AS IS" BASIS, WITHOUT WARRANTIES OR CONDITIONS OF ANY KIND, either express or implied. See the Licenses for the specific language governing permissions and limitations under the Licenses.